Wednesday, August 29, 2007

My winnings...thanks to Bari J!!

A few weeks ago, Bari J was hosting a contest on her blog in honor of her 101th post. I do love contests, so I thought I'd enter...but then promptly forgot about it. So, when she e-mailed me to tell me that I was the winner of one of her beautiful bags, I was stunned and surprised.Lucky for me, the bag arrived today, and is even more stunning than it looked in the picture on her blog (see above)! It's sitting in my office behind my desk and I've now had 3 people come in here just to see what it is, and another person who seem to be waiting for me to leave so they can steal it. ;)

If you haven't seen Bari J's work before, I definitely suggest you check it out. Each of her bags (from make-up bags and clutches, to hobo bags and totes) has such a stylish and fresh look that can be dressed up or down. I also love the "design your own bag" feature on her website, www.barijonline.com, which allows you to pick your style of bag and your fabric to create a perfectly customized bag to suit anybody's tastes. Go take a look for yourself, I think you'll like what you see!

Monday, August 27, 2007

Etsy Featured Shop - Mineral Magic

I haven't featured a new Etsy seller in a little while, but came across this shop in the forums and couldn't resist asking them to take part in an interview. In an attempt to show you all something new and different with each feature, this time around I have some beautiful mineral make-up for you, courtesy of Mineral Magic.
What inspired you to start making mineral based make-up?
I was inspired to do my own line of mineral makeup because my skin is ultra sensitive and I wanted to make a product that I was 100% sure would accommodate my skin issues.

What do you think is the main difference between your make-up and commercial make-up lines?
The difference between my makeup and the commercial ones is I know what I put in them. Anyone can put fillers in to stretch the product and I do not do that. In fact, I add more zinc to my product to increase the SPF factor up to 20% depending on how much you apply. Many other mineral lines have bismuth oxychloride which is kin to arsenic. That is most likely why people itch and skin gets inflamed. You wouldn't put arsenic in your body and it makes very good sense that you do not put it on your face.

What are the main mineral ingredients of your make-up?
The main ingredients are Mica (for color), Zinc Oxide (for sun protection), Titanium Dioxide
iron oxides and sometimes ultramarine blue depending on the color I need to create.

How do those act to keep skin looking good?
Our makeup is pure crushed minerals from the earth that does not clog pores. Surgeons and dermatologists worldwide have recommended mineral makeup for post operative scars, skin resurfacing, skin discolorations, to use after chemical peels, acne, veins, and rosacea. It is so safe you can even sleep in it to use as a skin treatment.

How do you choose the colors/scents that you make available for your products?
I choose colors that will accommodate everyone's wardrobe. A color for every season...
When someone orders a foundation, I always include a shade lighter and a shade darker along with the foundation. The seasons change and people should not have to go out and keep buying color after color. No one, to the best of my knowledge, has ever provided that service to a buyer. If you buy a color that doesn't match your skin tone from most companies, you are stuck with it. Not so with us. If your foundation color is not quite like you had expected, we replace it at no extra cost to the customer and they get to keep the product they bought.

What do you love about this item?
I love the 15 piece Mineral Magic Cosmetics Gift Set. The buyer gets to choose their eye colors, blushes, lotion bar scent, foundation color, and lip balm scent. Plus they get a 5 piece brush and carrying case collection and a retractable brush that can be taken with them anywhere they go. I always give out generous samples for buyers so that they can experience the other products I provide. No matter what the buyer chooses, they always get above and beyond what they paid for. That's what separates Mineral Magic Cosmetics from the rest.

What is your favorite type of make-up to make (i.e. eyeshadow, foundation, scents) and why?
I don't have a favorite color because you can take your foundation blush or eye makeup and blend them together to make your own color.

Did you play dress up with your mom's make-up when you were little?
I never played dress up with my mother's makeup. I wasn't allowed. boy, did I show her!

Tell me something fun about where you live?
I live in the Poconos. I am 4 miles from Pocono Raceway. There is always something going on and people to see.

Do you make other things outside of make-up? If so, what?
I make other things besides makeup. I have creamy lotions, hard lotion bars, face and body scrubs, lip balms and roll on body oils.

To learn more about Mineral Magic, visit www.MineralMagicCosmetics.com or the Mineral Magic eBay store.

Monday, August 20, 2007

2008 Diary Is Here!

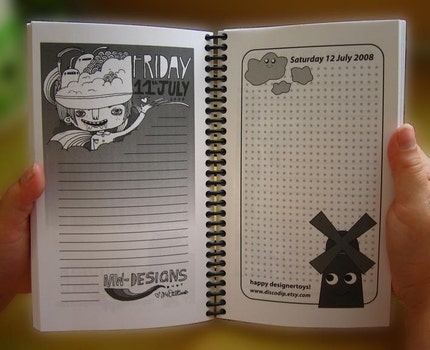
If you saw my post about the 2008 Diary, put together by Fantazya, I'm pleased to announce that the finished product is now available. This diary features hundreds of artists that sell their wares online and is a beautiful way to document 2008; as well as giving you a new artist to view every time you open it!

Click here to purchase the diary.

Wednesday, August 15, 2007

Moving on up - my 8 tips!!

Last month, my boyfriend and I decided to get a place together and once I got over the initial excitement, the realization that I had to start packing finally hit me. I've been in my studio apartment for almost 4 years to the day so this is a task that has definitely been a little daunting. I think it was also a little crazy that he had to be out of his old apartment by August 1st, so we've been squished into my studio (a large studio, but still a studio) for the last 2 weeks. It's not been so bad except for the bruises caused by falling over things.
You will need:
  • Packing tape (lots of it)
  • Boxes (I love Office Depot boxes because they have handles and we get lots of them at work)
  • Sharpie pens (preferably black),
  • Band-aids
My 8 tips to moving efficiently!
(Why 8 you ask? That's all I could come up with...I'm tired).

1) Clear a space for the boxes you pack to be stacked.
Suggestion: Keep an open escape route to the door so that you can exit the room.

2) Check bottoms of boxes are secure and seal accordingly with tape. Seal the packed boxes well at the top too.
Why?: There is nothing worse than packing it and realizing that if you lift it, the bottom will collapse. Use excess tape as necessary. It's cheaper to buy too much tape than it is to have to super glue the china plate your grandmother left you.

3) Pack things you are 100% sure you will not need.
Why this helps: This eliminates the chances that you will run around at midnight looking for your toothbrush and being unable to find it because you packed it in the box with all the stuff from your computer desk.

4) Label each box clearly with what "category" it's contents fall under. Feel free to be more specific.
Tip: Don't let the Sharpie pen you are using to mark the boxes fall in between other boxes. This is not helpful and will in fact impede your progress.

5) Use moving and packing as a good reason to purge things that you no longer need.
Hint: If you are a pack-rat like I am, have someone you trust go through your stuff with you. Tell them to be ruthless. When you find that Styx t-shirt with the holes that you used to wear when you were 13, that you feel like you need because of your intense emotional attachment to it, make them put it straight in a donation bag and out of eye-sight.

6) Hire movers! It's not as cheap as doing it yourself but it's worth it.
Why this is especially important: It saves your sanity, it saves friendships, it prevents injuries being sustained from having furniture dropped on you from a great height, as you attempt to navigate 2 flights of stairs while hoping to catch the queen-sized mattress being suspended from the balcony. Hired movers are professionals. It's what they do.

7) Movers will generally make you pay extra for wrapping furniture and for the actual wrap itself. You can buy a 1500' roll of plastic wrap at Office Depot.
Helpful tip: If your significant other starts to bother you, you can plastic wrap them to something until they learn their lesson.

8) When you arrive at your new place with boxes and furniture in tow, make sure you know exactly which box your liquor cabinet was packed in.
Why this is important: You're going to need it to immediately celebrate your success at having finally done it. The beauty of it being that you don't actually need to unpack glasses to enjoy the tasty refreshment. I would suggest waiting until you've sobered up to unpack though.

Have I been paying attention to my own tips? In most cases, yes. The good news is that we're picking up the keys tonight, which I am thrilled about, and I'll finally be able to get some of the boxes out of my place and figure out what on earth is still left to move!!

Wednesday, August 8, 2007

Marking the stitch....more swap fun!

Another crafty swap event (yes, I admit I am mildly addicted but by no means have a problem) has taken place. This time around, I have stitch markers for your viewing.

Up until now, stitch markers have been something I've been aware of but haven't needed to use much, and I have always been able to get away with using scrap yarn. This swap inspired me to try making stitch markers for the first time, and even better, use shrinky dinks!

I should note that when my swap partner said she'd like something with shrinky dinks, I was a little perplexed as I wasn't entirely sure what they are. Perhaps we didn't have them in England when I was growing up there. After I looked them up on Google and on craftster.org, what I have since discovered is that they are very entertaining!

The requirement was to make a set of 12 markers for my partner, so I started off by coming up with my concept, which ended up being the 12 signs of the zodiac. I found images representing those signs, traced and colored them onto the shrinkies, amused myself with the shrinking process in the oven, and this is how they ended up...
The actual tracing of the images is what took the longest, but I have to say that a 12 pack of colored Sharpies certainly can go a long way!

In the meantime, my partner was busy making a set of markers to send to me. She seems to have had much more experience than I have making markers in the past so I was excited to see what she would come up with. Fortunately the Canadian post didn't take as long as we thought it might and here's what I received in return - there are some really pretty and unique beads included in this set, plus a couple of different sizes for my projects. I can't wait to find a project to use these for.

This whole swap process definitely has my creative juices flowing and is inspiring me to try new things. For as long as someone is organizing them, I'm sure I'll keep joining them!

Tuesday, August 7, 2007

A little bit punk rock, a little bit funky...

I was just a swap "angel" for the first time on Craftster.org. This means that someone was flaked on during a craft swap and an angel is required to fill in so they still receive a swap item.

I was an angel for a girl who had not only been flaked on by her original swap partner, but had also been flaked on by her first angel! Several of us ended up feeling so bad that we decided to take it upon ourselves to each send her something so that she ended up with more items than she would have received in the first place!

As the swap was a writer based swap, I decided to use this as an opportunity to try something new and make a journal from scratch. She mentioned that she likes black with contrast colors, gerbera daisies and punk. I think this fits into each of these categories!!


Here's a brief description of how I made this:

I took standard paper and cut a stack to size with a guillotine. I then took two pieces of cardstock and cut them to be slightly larger than the paper. Using a single hole punch, I evenly marked where holes would go down the one side of paper and also on the cardstock to match. Using a thin piece of ribbon, I weaved it through the holes tightly, tying in a secure knot at one end for accent. I then found a drawing of a gerbera daisy and using digital editing, altered the color curves to create 4 accent flowers. I then cut these out and collaged them on the front cover...VOILA!

It really was that simple and I love the result. I definitely plan on making more of these - especially as they are so easy to customize.