Friday, December 14, 2007

How to plan a wedding in 10 days...

My soon to be dear hubby and I will be getting married a week from tomorrow. We've been together for almost 10 years and were just wee children when we started dating (freshman year of college). A couple of weeks ago, the stars aligned and we decided to get married! All the important people in our lives were going to be in town at the same time and we figured, why wait? After all, we've been together for so long it's not like anybody is surprised. In fact, "it's about time" has been the most common response received.

Of course, planning a wedding in such a short time frame is a completely different thing from having a standard year or so to figure everything out. Personally, I've been loving the fact that I don't have time to stress over the details that drive many brides nuts in the months leading up to the big day. While my wedding planning is coming to a close, I had to share the things that I've learned.


Here's 10 tips on how to plan a wedding in 10 days!!

1) Decide where you want the ceremony and reception to take place and how big you want the guest list to be. It's probably easier to keep it small and restrict it to close friends and family. This also increases your venue options as you can perhaps have it at someone's house, in a park (check permit restrictions), or a multitude of other places that mean something special to the two of you. If you are deciding to have a reception after the ceremony, check out whether the venue that you are choosing for the ceremony has a reception space or if you would need to move to a different location. Keeping the guest list small also means you won't offend anybody who isn't invited.

2) Make an appointment to go dress shopping straight away. Dresses usually take 6-8 weeks to order in, so keep in mind that you will probably have to buy something off the rack. Places like David's Bridal do alterations and cleaning on site, so that can be very valuable when you're short on time. Also, check for bridal sections at stores - such as Nordstrom, JC Penney, and even Target! Don't forget to bring your girlfriends with you for opinions, and if the store will let you take pics, do so (most bridal boutiques won't, but the bigger chain stores generally don't have a problem with this.

3) Start researching rings. If you're deciding to get married on the spur of the moment, he may not have had time to get you an engagement ring. Firstly, decide what your budget is, then call around friends and family to see if somebody has a jeweler that they trust - they will often be able to give you a bigger and better diamond for the same price or less than mall jewelers. Read up on your 4 Cs of diamonds and you'll need the information in your head when talking to a diamond jeweler!

4) Figure out who you want to have officiate the ceremony. Approach the minister or rabbi as soon as possible to make sure they are available. If you had your eye on a specific church or temple but the date isn't available, check to see if the minister or rabbi would be available to do the ceremony at a different location. If you are planning on having a friend marry you, who was ordained online, call the county clerk's office to make sure that they will consider that person a legal officiant.

5) Once you have figured out the where and when, find a caterer as soon as possible. It's generally easier to find a caterer at short notice when you're getting married "off season" but again, try local restaurants and such to see if they offer a catering service - you don't need to rely on traditional wedding caterers for your event! Also, caterers often offer the option to rent table linens etc., so don't forget to ask if they can make those available to you.

6) Investigate the requirements for a marriage license where you need to go to file for one. For example: in Los Angeles, the application for a marriage license can be submitted online. You then have to go with your partner to the county clerk's office, who will print your marriage license (valid for 90 days) and give you the information you need for marriage certificate filing. I suggest going early morning when the office first opens as you'll be there and out before long lines build up!

7) Think about your ceremony and vows. Web sites, such as http://theknot.com are excellent resources for vows from different religions, including non-denominational or mixed religion ceremonies. Once you've figured out the basic structure of your ceremony, you can then look for readings that are special to you as a couple, as well as finding hundreds of beautiful love quotes and poems online. You may want to ask a couple of guests to do these readings during the ceremony to give it a personal touch. Also, pick a couple of songs that mean a lot to both of you for the aisle processional and recessional. Whether it be religious, classical or contemporary music, it is the perfect way to set the mood.

8) Think about decorations. You will probably want to keep it simple and decide on some basic but effective accents to decorate your ceremony and reception. Flowers and candles make a simple but beautiful statement, and can also be done quite inexpensively. Check out your local farmer's market for flowers that you can put together yourself. Votives and tea lights are also inexpensive at many chain stores. Places like Michaels and other craft stores have tons of wedding items should you decide to do place settings, favors, or get vases/bowls for center pieces.

9) Instead of going for a huge tiered cake, see if a local bakery can do a decorated sheet cake for you. Also, find out what notice they need to make it. I'm lucky that my favorite local bakery can do a decorated cake in the flavors of my choice (white cake and fresh strawberries) for me with 4 days notice for $50. It's quite the steal and I'd never have eaten a frozen top tier of a wedding cake anyway!

10) Invitations are a wonderful keepsake, and even if you end up just calling everybody to give them the news and tell them when to show up, they may want an invitation to put on their fridge anyway! Office Depot carries a whole line of printable wedding invitations, which come in a pack with RSVP cards, pretty seals, and matching envelopes. As you probably don't have the time to get your invitations professionally printed, take some time to design them on your computer - pick the fonts and wording that you like, then make sure you print the test sheet before you start on the real ones!

Friday, December 7, 2007

Finally made something for myself!

I am so frequently caught up in making things for my Etsy shop, or charity, that I am very excited that I finally got around to making something for myself! I present to you my latest knit item...(thanks to my co-worker for taking these pics of me).
I found this beautiful pattern on Ravelry and I just knew that it was going to be something that I needed to make. The pattern is Ophelia, and can be found here. The design is originally for a cardigan, but it wasn't sitting right on my wide hips. I went ahead and seamed it at the front (using the invisible mattress stitch seam) and now it's a v-neck instead. I've been getting compliments on it all day at work and I'm really happy to be showing off my handiwork.
A view of the lace pattern at the back.

Sunday, December 2, 2007

Never work with animals and children?

In my absence from posting here on my blog, I've been up to all kinds of things - including Thanksgiving, wedding shoots, and a multitude of holiday related charity crafting. One of my favorite things that I did in the last couple of weeks was shoot holiday card photographs for my co-worker, her boyfriend, and their dogs, Dakota and Diesel.
I've heard it said that you should never work with animals or children, and to a certain extent I understand why. Having said that, it's also a ton of fun! It's tough to get two dogs to look at you at the same time, and co-ordinate the owners too. I was pleased with the results of my first experience with the pups though and would definitely do it again.
Marc with Dakota (above) Janelle with the baby - Diesel (above)

Tuesday, November 13, 2007

Etsy Featured Shop - Cardwear

I know I haven't featured an Etsy shop in a little while. I've been looking for something different and creative to showcase. I came across Cardwear and decided it was the perfect shop for an interview because of how wonderfully unique the cards are on offer. I definitely suggest taking a minute to check out this shop and see if there's a card fit for a special occasion!
How did you get interested in paper crafts?
I started with scrapbooking, mostly in the form of gifts for other people (my poor children don't have very much in their books!). Originally I had a few fun stamps that came in handy and tons of stickers. There are so many fun and beautiful supplies for scrapbooking that it was easy to get sucked into the hobby. Occasionally I would make my own cards, but it was mostly for times when I forgot to purchase a card (like Grandparents' Day). I also bought a lot of supplies in the hopes of finding an appropriate use for it later.

What inspired you to use fabric on your card designs?
I actually used a Noah's Ark fabric when I made my oldest son's baby announcements, but I didn't start using fabric regularly for almost two years after that and that was really by accident! I usually send out cards to family and friends for every holiday. I love snail mail. It's so much fun to get something besides bills and junk mail! One Halloween I discovered that I hadn't ordered enough cards. I ran to the store looking for ideas to make my own cards and found some fabric I liked for $2.00 a yard. I picked up some matching orange rick rack and a pack of blank cards, then headed home.

After several attempts, I happened upon the design I use in a lot of my cards and finished it off by placing my son's picture (in his lion costume) on the front. Since I had so much fun, and really liked how the cards looked, I went back to the store the next day and bought a lot of Christmas fabric and coordinating ribbon. I took my sample cards to show my in-laws and my mother-in-law gave me a lot of her leftover fabric from quilting. For the past three years I have been making my own greeting cards to send and also packaging them for gifts.

Do you buy supplies with a specific card in mind, or do you get ideas from your stash?
A lot of my ideas come from my incredible stash. I have an amazing supply of beautiful quilting fabric and I am always willing to buy a yard of fabric (or even a fat quarter) if I think it will make a pretty card. There are some cards, like my Fruity Phrases line, where I went in search of a particular fabric. I was excited to finally find a watermelon print that is small enough for me to use. If someone wants a particular subject/design, I can usually find it. I also get inspired by different ribbons and trims. Several relatives have gone through their old sewing supplies and given me notions they no longer need. I am not much of a seamstress, but I have been able to use a lot of those trims and rick rack on my cards.

How do you come up with the cute phrases you use in your cards?
I have a very large collection of rubber stamps. As my fabric collection has grown, so has my stamp collection! But if I don't have a stamp, I will also hand write the phrase I need. I have made baby announcements for all three of my kids, as well as for some of my friends' babies. I really enjoy matching a phrase with a fabric. For my daughter's baby announcements, I used a lovely bee fabric and wrote “Have you heard the buzz?” on the outside of the card. For another announcement with frog fabric I added, “We're 'hoppy' to announce...”

Why do you love this card?
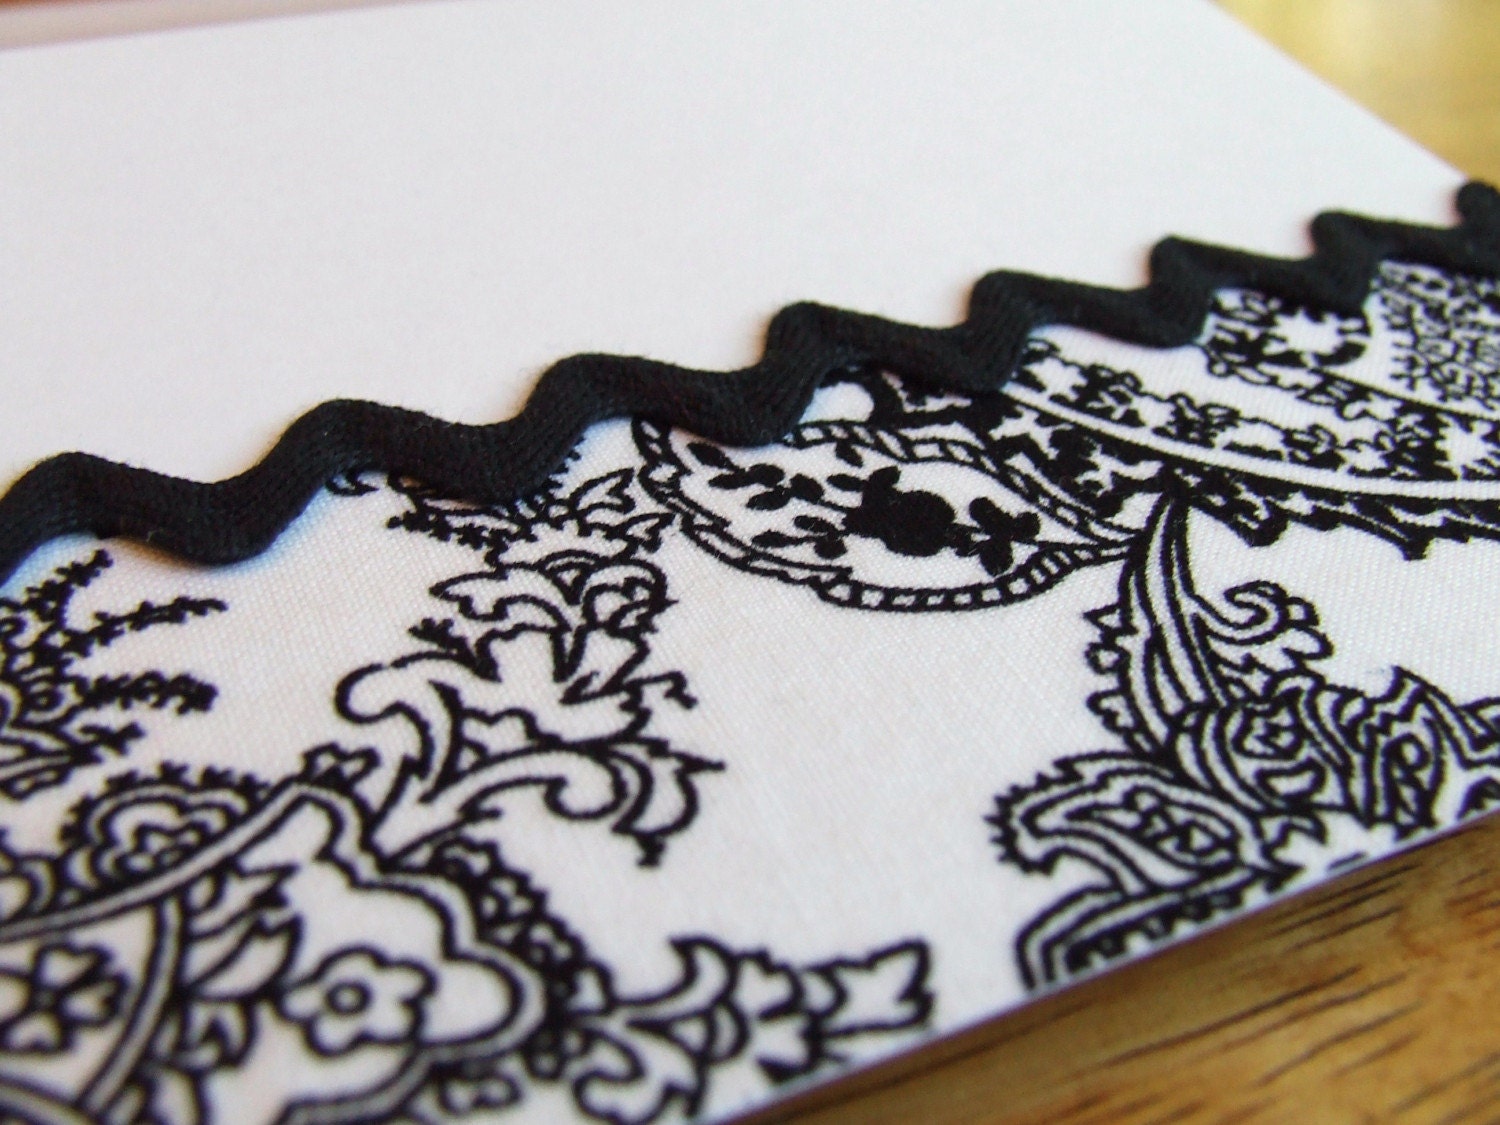
I find this card to be very elegant. I love the clean, crisp look of a card that is only black and white and I think that the pattern of the fabric used on this card is just beautiful. For me, this card makes me think of a pretty dress. I think I would love to have a dress made out of this fabric. I often feel like I am dressing up the cards that I make (which is where I came up with my name: Cardwear).

You also do concrete impressions. What is the process for that?
Lengthy. Equal portions of portland cement and tube sand are mixed together with water until it is the consistency of cookie dough. Wet tube sand is either mounded (for bowls) or smoothed to a flat service (for plates or ones to be hung). The leaf of choice (hosta, castor, morning glory, elephant, etc..) with good veining and a non-fuzzy underside, is then placed face down (underside face up)on the sand. A handful of medium is rolled into a ball (about the size of a meatball) and placed in the center of the leaf. It is gently pressed to no less than 1/4 inch in thickness. Another ball of medium is used, overlapping slightly what is already on the leaf, while petting back and smoothing out so you cannot see any joints. The process is repeated until the leaf is covered.

If making a bowl, one last ball of medium is used to make a pedestal for it to sit on. If hanging, heavy wire is used to make a loop and placed on the leaf where you want it to hang from. The leaf needs to set for 12-24 hours to cure. Then it is flipped and left for the sun to bake it for a few hours. The leaf will dry and lift, making it easy to peel off. Then the leaf impression needs to continue curing for 5 days.

The leaf is sealed with an acrylic clear spray. Watered down acrylic paint is used to get the faux finish and the colors are layered on using a dry brush technique. Once the leaf has the desired coloring, it is resprayed with the acrylic clear spray.

Do you do impressions of things other than leaves?
I also have impressions of some flowers, like Rose of Sharons and Hibiscus. It is a very similar process. Each leaf or flower is only used once, so the pieces are truly unique. No two castings are ever the same.

What do you find interesting about this piece?
This hosta leaf casting is just beautiful. I really like how well the veining of the original leaf came through on the concrete impression. The coloring came from many layers of different paint colors. I like how the light catches those different colors and highlights different aspects of the leaf. This particular impression is also “flatter” than some of my other leaves, so it is more of a platter. Most of my hostas become bowls, so it's a more unique design as a platter.

What other crafts do you enjoy?
I also enjoy painting and cross-stitching, but both of them take a long time, which is something I rarely have with three little ones. I usually will do those for gifts. If possible, I prefer to make a gift for someone. I think it just makes the gift so much more meaningful. With the help of my mother-in-law, I made my mother a quilt for her 65th birthday. We incorporated family photographs into the quilt design, creating a photo memoir of my mother's life. So I guess I have taken up quilting, too!

You have many holiday inspired cards. Which holiday is your personal favorite?
Christmas has always been my favorite holiday. Of course, it has really changed for me now that I have children. I love decorating the house, making Christmas cookies, wrapping presents, and sending out Christmas cards (handmade, of course!). We always write a Christmas letter touching upon the highlights of the past year (mostly my husband's doing – he's the writer in the family). We try to find a fun way to do it. For example, in past letters we've written alternative lyrics to songs (such as “Status Quo” set to the music of “Let it Snow”) and parodies of children's books (Dr. Seuss inspired). Of course, now everyone expects a creative letter from us... Hopefully, we can keep up and not disappoint anyone!

Where else can we find out more about you?
I don't have a blog, but I am a part of the EtsyGreetings Team. We currently have a Winter Holiday Promotion featuring cards from many of the team members. I have a spot in "round 2". My cards are included Nov 8-14, 22-28 and Dec 6-12. The website link is:
http://cljdesigns.typepad.com/etsygreetings

Friday, November 9, 2007

Custom orders are fun!

A little while ago I was commissioned to custom knit a neck warmer. The colors were requested as purple and charcoal, so off I ran to the store to find yarn that would suit those needs.

A week or so later, after some creativity with how to put the colors together without striping them and deciding what knit stitches to use, here's what I came up with - modeled by the customer and with her permission to use this photo as a customer appreciation pic!

Custom orders can be a lot of fun - I've designed knit items and done banner design so far. I've got more in the works right now, and considering how much I love working with people to design for them, I hope more are on their way!

Monday, November 5, 2007

Accepted to Ravelry!

I should apologize for my absence over the last week or so - I was preparing for the annual craft fair at work. It's hard to man your own store and try to run the place at the same time so sales weren't everything I was hoping for, but I did make a little extra cash to spend over the weekend!

Now that I am back, I have to tell you that I was accepted to Ravelry as a beta testing member. For those of you who knit but haven't heard of this site, I can only suggest getting on the list to join asap (it only took a couple of weeks to get accepted after I signed up for the list)!

The site provides a comprehensive way to keep track of your projects, needles, yarn and patterns that you want to try. It also has a database of yarns, an easy search for projects (including the function to add ones you'd like to try to your queue), and forums to touch base with other yarn fiends. As if I don't have enough website addictions, this one is just another that I love and will spend far too much time messing around on. So, come join me. If you're already on there, my user name is organicstills - look me up. :)

Tuesday, October 23, 2007

DONATION INFORMATION

A quick update to the blog that I just posted below. While we are still fighting the fires, I am offering to donate 50% of proceeds from any sales through my Etsy store through the end of October to help the victims of these fires.

Other Etsy stores also donating include:
SoCaliGirl
Yummy Body Candy
BuyMySupplies
PaperZombie, Ink.
FlowerFaeries
Althena12
SallysCreations
Shellsnoel
OhPotato
Bringing Back Memories
SpazSpun
KnitBlitz
Gondancin
Earmark
Teha
Livia's Treasures
Dragon Lady Designs

Please see this blog for additional information. http://witch-fire.blogspot.com/
Click here to donate directly to the American Red Cross for San Diego relief efforts.

Here's How You Can Help in San Diego:

DONATE:

Food/Supplies: Please note that recent information is that they currently have enough supplies at Qualcomm.
You can donate to the Qualcomm Stadium Evacuation Center at Gate P (9449 Friars Rd., San Diego, CA 92108)

They are looking for the following items:
1. Prepared food (sandwiches, commercially prepared of pre-packaged food (not homemade); for both lunch and dinner)
2.Milk
3.Ice
4.Cots, blankets, sleeping bags and pillows
5.Air Mattresses
6.Sunscreen
7.Canopies for shade
8.Paper Towels
9.Handi Wipes
10.Toilet Paper
11.Paper Plates, cups, utensils
12.Disposable Styrofoam Coolers
13.Pet Food, Pet Carriers, Leashes
14.Cell phone chargers/batteries


Food Storage Trailer:
The City of San Diego is looking for a refrigerated trailer to store donated food on site. Anyone with such a trailer can call (619) 236-6167.

Money
The American Red Cross is also encouraging people to donate money online through their website. Click on "Donate Now", then under Donor Designations, pull up San Diego Wildfires DR 187-8. The monetary donations will provide shelter, food, counseling, and other assistance to victims of the fire.

Blood
The Blood Bank is accepting blood donations today at its Hillcrest and East County offices. Anyone at least 17 years old, who weighs at least 110 pounds and is in good health, may qualify to give blood.

Blood Bank Locations for donations are:
- 440 Upas Street in Hillcrest (619) 296-6393
- 680 Fletcher Parkway in El Cajon (619) 441-1804

There will also be "Blood Mobiles” located at Qualcomm Stadium and at the Del Mar Fairgrounds through 3:30 p.m. October 23, 2007.

VOLUNTEER:
If you want to volunteer, visit Spontaneous Volunteer Processing Center (SVPC) at 5331 Mt. Alifan Drive San Diego, CA 92111

I am thinking of you

I am fortunate enough to be in an area of Los Angeles County not directly affected by the Southern California fires that are currently raging. Having said that, because I am not in the direct line of fire doesn't mean that it doesn't affect me in other ways.

I have friends with family in Santa Clarita, co-workers who live 2 blocks from mandatory evacuation sites, a friend who is a volunteer fire-fighter and has been on the fire lines since 5am on Sunday morning. Down in San Diego, my alma mater (UCSD) has been closed, an unimaginable concept. The tenant living in a condo my parents own, and other close family friends living in Scripps Ranch have been evacuated. I used to live in that area and it's hard for me to picture what it will look like when the fire has taken its course.

Looking at a picture that someone took of the Canyon Country fires and posted on Flickr, there are many people out there who seem to think that this is some kind of divine retribution for the lifestyles that we Californians live. I find it hard to believe that there are people out there who can see this kind of tragedy unfold and think that anybody deserves it because they "should have known" that they live in a brush fire area. It's amazing that there can be such a lack of compassion when so many people are suffering.

So, to all of those who have been displaced from their homes by these fires, I am thinking of you and hoping for your safety. I am thinking of the firefighters who are risking their lives to save so many people and their possessions. I am thinking of those who are worried that they may be evacuated. I am thinking of those who have friends and family in the affected areas and aren't sure if they're ok. I am thinking of the animals that are losing their habitats. I am thinking of the beauty of these areas that are now burned and the landmarks we may have lost.

I hope that the fires will soon burn out and the Southern California communities will find safety once again.

While I do not have any photography covering these current fires, please see my previous post on the Griffith Park and Barham fires from earlier this year.

Thursday, October 18, 2007

I do love action shots

I posted the things that I received in the photographer swap I was in, but they do not compare to the wonderful action shots that my partner posted of the things she received from me! I have to share my favorite picture of my favorite item that I sent to her.

This hat was knit using a raspberry colored yarn in a very basic beanie pattern. I used yarn overs to create the gaps through which I threaded the contrasting grey ribbon. Then I made a pin, using a pin-back, a paper clip, and some beads with letters to spell the word "exposure". My boyfriend didn't quite get why I chose exposure as the word for this pin, but I thought it had a good double meaning myself!

Thanks to Jac for modeling the item and doing a much better job at it than I would ever have imagined!

Friday, October 12, 2007

Music, music everywhere!

This week, I seem to have a music theme. When I was creating my new photo listing for Etsy today, I realized that I when I am coming up with the names for my photographs, I am so often inspired by songs and their lyrics (from the obscure to the ridiculous!)

Here are some real life examples:
Eyes Without A Face
London Callingand a variation on the original...
Tequila Sunset
Now, here's the challenge - can you name those bands?!

Wednesday, October 10, 2007

Music For My Lover

There is a thread posted on Etsy right now challenging people to make a poster sketch with the items you would buy for your lover. I found this one to be pretty easy as the thing that my boyfriend loves best, next to me of course, is his music. I might have to make him one that's poker related too... If you're interested in making your own, click here.

If I had a million dollars, I'd buy him all of these things...and an exotic pet...like a llama, or an emu (yes, name that song!)

Tuesday, October 9, 2007

When two photographers collide

I finally got the courage to organize my own swap on craftster.org - and of course it was a swap for photographers! Now that my partner and I have both received our packages, it's time to show you all the lovely things I got. There's a lot of images, but that's what we photographers do!!

A collection of old postcards

Magnets and some photography books

A box to hoard supplies, with a music and film theme


Original artwork by my partner and her boyfriend

Wednesday, October 3, 2007

Not quite a scarf

So, I have started seeing a lot of neck-warmers about. They're not quite a scarf, but serve the same function when wearing a jacket, without generating bulk or unwrapping themselves from your neck at inopportune moments.

Seeing as I'm always looking for new things to do with low-yardage skeins of yarn, and had a lovely wool blend to play with, I thought I'd give it a shot and design my own. This one involves alternating stockinette and garter stitches, with complimenting 3 button closure.I'm really happy with how this turned out and seeing as it gives me such an opportunity to play with new stitches and fun yarns, I think I'll probably end up making a whole bunch for my Etsy store and holiday presents of course!

Tuesday, October 2, 2007

There really is a little kid in each of us

You may be wondering what other activities I get up to when I'm not crafting. I am here to tell you about KICKBALL. Yes, the game with the big rubber ball that's kind of like baseball/softball but is generally played by 5 year olds. A couple of years ago, the company I work for found out about a kickball league close by, run by the World Adult Kickball Association, and being the nerds that we are, we started a company team - the Rhino Stampede.

Seeing as I grew up in England, kickball isn't a game that I was at all familiar with. Last "season" I decided to join the company team and find out what it was all about - has to be said, it's a lot like dork central, but a fine way to spend a Monday night! There are certainly people out there who take their kickball very seriously, having tactical meetings and secret signs for plays. Our team is the one most likely to make margaritas in Gatorade bottles and consider that an "energy drink".
My second season on the team ended last night in the semi-finals of the playoffs. Having spent most of the season doing rather badly [insert: reaction shot to our first in a string of wins], we went into the playoffs seeded 12 (out of 16 teams in our local league); however we definitely found our stride in the last few games and upset some higher seeded teams with our success.

We were finally beat by the #1 seeded team, and our bitter rivals, in the semi-finals game last night. There is no way that anybody would ever have guessed that we would get anywhere near as far as we did - in betting terms the odds were definitely long! We're kind of a Cinderella Kick-balling story...or perhaps better likened to Seabiscuit.

WE KICK BALLS!!

Friday, September 28, 2007

Congrats to Dancing Mooney...

She entered my contest below, and is now the proud owner of the "Spring Green" earrings shown in the post below. The ACEO, officially titled "Simplicity" is now available in my Etsy store.

Back to our regularly scheduled programming...

Wednesday, September 26, 2007

A contest!

I have always enjoyed participating in contests being held on blogs, so I have decided to hold one for you! This is also to celebrate the move that I will be making into a new position at work, starting Monday of next week - there's a lot of excitement going on right now!

What is the contest you ask? I want you to help me name this ACEO piece that I will be posting in my Etsy store.

In order to enter, just leave a comment with the name that you came up with on this blog. Make sure that there is contact information so that I can get hold of you if you win! I will be picking a winner at the end of tomorrow (Thursday Sep. 27).

The winner will receive their choice of a pair of earrings shown below.


I can't wait to see what you all come up with! =)

Saturday, September 22, 2007

Another swap - Promo items galore!

I'm still in swap mode on craftster.org, this time around a swap organized by my friend Holly (http://hollylynne.etsy.com). In an attempt to get exposure to my Etsy store, I decided to take the opportunity to swap promos with other Etsy sellers. The point being that when we get sales, we enclose these promos with the item sold - which is a benefit both to the buyer and to each of us as sellers.

From the 5 people I swapped with, I received buttons, magnets, coupons, business cards and more. I chose to make stitch markers, which could also double as charms, to attach to my business cards. I used a variety of beads that I have from my jewelry making efforts, and purchased 10mm jump rings to attach to the top. I'm really happy with how they came out and hopefully some lucky buyer out there will love them as well!

Monday, September 17, 2007

Knit stitch overdose!

I am in the process of creating woolly items for the winter - to sell in my Etsy store, at an upcoming craft fair (held annually at my workplace) and also to give to friends for holiday gifts. In particular, I have wanted to find some fun knit stitches for scarves and, in my mad googling ventures, I came across the site Knitting Fool. This site has to contain the most comprehensive list of knit stitches that I have seen to date!

The stitches are all cataloged alphabetically by name, with an easy to read grid the number of stitches and number of rows needed to complete the pattern. You even have the option to sort the list by the stitch count in case you are looking for a certain number of stitches. My only complaint would be that not all of the patterns have accompanying pictures, so it leaves a little to the imagination (but I can't complain too much because I can imagine it would take forever to knit swatches for each of the stitch patterns on the site)!

Here's my simple lace pattern for today, I'm not sure what it's called, but I believe it's a variation of the Faggot lace stitch:
Cast on any multiple of 3.
K1, yo, k2tog for each row until piece is desired length

It's simple yet effective, plus it's a reversible pattern. Enjoy!

Thursday, September 13, 2007

A crafty bridal shower gift

I was so busy planning for my good friend's bridal shower that I didn't have all that much time to plan the perfect gift. Then it came to me that I'm one of those crafty folk that can make something unique last minute! I had bought some Mod Podge to decoupage something for a craft swap on craftster.org and decided to put it to good use for this gift.

The couple were traveling to NYC for their honeymoon, so what better than to create something to put a couple of honeymoon photos in. I took a picture that I had taken while in NY a couple of years ago, cropped it, and decoupaged it to a glass frame. Here's the end result. It wasn't perfect, but it was perfect for the couple, if you know what I mean!
The good news is that both the bridal shower and the gift went down well. We played games from "name that love song" to "match famous couples through history" and created a CD of songs picked by the bride that included the bizarre and obscure. How Liz Minelli can appear on the same track listing as Def Leppard is a mystery (but a fun one none the less).

Wednesday, September 12, 2007

I've been tagged!

Dancing Mooney just tagged me. That means, I have to tell you 6 interesting facts about myself, and then tag 6 new people!

So, here we go...

1) I've already been a citizen of 2 countries (Singapore, where I was born, and England, where I grew up). I'm working on my green card for the US, and will hopefully get citizenship later on, which would make 3 countries and 3 continents!
2) As well as my day job and my crafty endeavors, my boyfriend and I are co-owners in an event production company - 4:SCORE Entertainment. He DJs and I use my photographic skills to make him look pretty. =)
3) I am completely self-taught in my photography. I started with a 35mm point and shoot, which didn't have a zoom or anything! It just took off from there.
4) I modeled as a kid, until I was about 13 years old - when I stopped growing upward (I'm 5'3") and became too "womanly"! (Yes, that's me aged 10 in the polka dots on the left.)
5) Despite living in England until I was 18, I don't have an accent. People always seem to think I'm Californian born and bred, but really I'm just incognito.
6) If I could have any job in the world, I would be a photographer for National Geographic and would fly around the world taking pictures of elephants and icebergs (not necessarily at the same time, but you catch my drift!)

Monday, September 10, 2007

Etsy Featured Shop - The Bead Lounge

Having come across The Bead Lounge on Etsy, I was inspired to contact this seller for an interview. Amber specializes in glass work, which I personally find to be a fascinating art (perhaps because you get to play with fire and melt things!) It's something that I myself would love to try but don't think I'll get to anytime soon. So, why not take this opportunity to learn more about this art and this artist here.

How did you get your start making lampwork beads?
When I decided to learn lampworking, I was strictly a jewelry 'crafter' and wanted to make beads to use in my designs. I took my first (and only) class in 2000 with a local teacher to learn the safety and equipment requirements for the hobby. After my 3 hour class, I left with a basic lampworking kit and haven't stopped yet!

Does it take a long time to learn this craft?
It doesn't take long to learn "how" to lampwork. A beginner's class can be anywhere from 3 hours to 16 hours, depending on the teacher and their structure. It does take a long time to perfect a basic bead, learn how to control the glass, and you can spend endless hours learning new techniques. That's what I love about this art form, there are endless possibilities for working with glass...

What is the difference between making lampwork beads and creating fused glass pieces?
'Lampworking' uses a torch. Artists have the choice between a single fuel torch (which is an inexpensive way to learn) or a duel fuel torch, which will allow you the opportunity to work with a wider variety of glass and make larger glass items. Glass is purchased in rod form, which is about as thick as a pencil and 12-13" long. Using the torch, you melt the glass and wind it around a steel rod to form the beading hole.

'Fusing' is a warm-glass hobby that requires you to cut sheet glass specially made for fusing into the shapes you like and then a kiln to melt this glass together to make anything from small jewelry pendants and beads to larger functional pieces like dishes. The larger kiln you have, the larger the piece you can make. There are even 'walk-in' kilns available. Some artists make awesome sculptures like water fountains and fused glass windows!

Do you begin each piece with a concept or do you design as you go?
This depends a lot on my time constraints. Although I am a full time artist, I also have 3 children, a husband and a household to take care of. Sometimes I will sit down and make what I call 'production beads'. These are my simple supply pieces, like spacer beads. Other times, I am working specifically on an idea for a customer, requiring me to stick to a concept that has been requested by a client. I have the most fun when I can sit in front of my torch and just 'play' with the glass and see what happens. Usually, I am surprised by the color combinations that occur with no real effort on my part. That's where the joy of creating comes in for me.

How do you make your color choices for your beads?
I really like working with neutral, earthy colors. These are what I prefer to wear, design with, and am naturally drawn to. There is something so organic about working with glass. I have a difficult time creating with the brighter, more vibrant colors...for some reason, my mind won't wrap itself around designing with these as easily. A lot of the time, if I just pick up some glass and try random things, an idea will just pop itself to the front of my mind.

Do you prefer to sell your beads as they are and let others create from them or do you like to create finished pieces yourself?
I've been asked this question a lot. Right now, I simply create the beads and then hand them over to designers to work with. I tend to be very simple in my designing, and sometimes I can't wrap my head around how to actually 'use' any of the beads I make in a design I think they are worthy of! I have some amazing clients who do incredible work with my beads, far better than I think I could ever do!

What do you love about this piece?
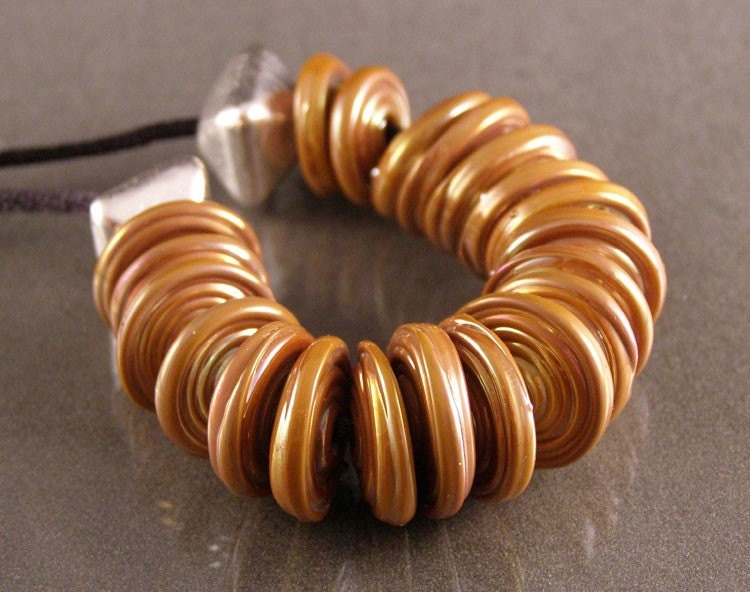
Of all the beads I've ever made, the set I called 'acid rain' has to be my favorite.

There is something random, yet controlled with these beads, and they are the perfect example of how being playful while creating can get amazing results. This set wasn't planned in my head, it just happened by accident and I went with it. The flow of the set when placed together is astounding to me and the colors are absolutely breathtaking in my opinion. The luster glass used to create this set gives you so many colors all within one bead.

Where do you get your inspiration?
The wonderful thing about art, any art, is that inspiration is all around you. I get mine from everyday places - watching my kid's cartoons (how colorful are they!?!), the natural beauty around me (we live in a rural area with gorgeous scenery), and I am absolutely inspired by other artists. I try not to look too closely at what other people are doing with glass, because I never want to lose my own voice, but I definitely have artists I look up to and am inspired by. It is always my goal to take that inspiration and create something in my own voice.

What other crafts, if any, are you hoping to try?
I'd love to get my hands into PMC (precious metal clay) and silver-smithing. I have always loved the look of silver, and being able to create anything in that medium would make me really happy.

Do you have any advice for fellow crafters?
Do what you love. I've seen too many people get into glass (lampworking, fusing, blowing, etc...) because they see other artists making a career out of it. Success in this field doesn't happen overnight, and if that is the sole reason for doing it, you'll never be happy. After 7 years in the field, I'm still learning, growing and trying to build a name for myself. Creation (in any form) should happen because it feeds your soul and fills a void that can't be filled with anything else.
Lampworking especially takes a lot of hard work to become good. and when you are good, it takes passion to become great but, like anything else, if you fall in love, there is nothing else you would rather be doing. Find art in everything...

To learn more about Amber and her craft, also visit her website - www.thatbeadgirl.com.

Wednesday, August 29, 2007

My winnings...thanks to Bari J!!

A few weeks ago, Bari J was hosting a contest on her blog in honor of her 101th post. I do love contests, so I thought I'd enter...but then promptly forgot about it. So, when she e-mailed me to tell me that I was the winner of one of her beautiful bags, I was stunned and surprised.Lucky for me, the bag arrived today, and is even more stunning than it looked in the picture on her blog (see above)! It's sitting in my office behind my desk and I've now had 3 people come in here just to see what it is, and another person who seem to be waiting for me to leave so they can steal it. ;)

If you haven't seen Bari J's work before, I definitely suggest you check it out. Each of her bags (from make-up bags and clutches, to hobo bags and totes) has such a stylish and fresh look that can be dressed up or down. I also love the "design your own bag" feature on her website, www.barijonline.com, which allows you to pick your style of bag and your fabric to create a perfectly customized bag to suit anybody's tastes. Go take a look for yourself, I think you'll like what you see!

Monday, August 27, 2007

Etsy Featured Shop - Mineral Magic

I haven't featured a new Etsy seller in a little while, but came across this shop in the forums and couldn't resist asking them to take part in an interview. In an attempt to show you all something new and different with each feature, this time around I have some beautiful mineral make-up for you, courtesy of Mineral Magic.
What inspired you to start making mineral based make-up?
I was inspired to do my own line of mineral makeup because my skin is ultra sensitive and I wanted to make a product that I was 100% sure would accommodate my skin issues.

What do you think is the main difference between your make-up and commercial make-up lines?
The difference between my makeup and the commercial ones is I know what I put in them. Anyone can put fillers in to stretch the product and I do not do that. In fact, I add more zinc to my product to increase the SPF factor up to 20% depending on how much you apply. Many other mineral lines have bismuth oxychloride which is kin to arsenic. That is most likely why people itch and skin gets inflamed. You wouldn't put arsenic in your body and it makes very good sense that you do not put it on your face.

What are the main mineral ingredients of your make-up?
The main ingredients are Mica (for color), Zinc Oxide (for sun protection), Titanium Dioxide
iron oxides and sometimes ultramarine blue depending on the color I need to create.

How do those act to keep skin looking good?
Our makeup is pure crushed minerals from the earth that does not clog pores. Surgeons and dermatologists worldwide have recommended mineral makeup for post operative scars, skin resurfacing, skin discolorations, to use after chemical peels, acne, veins, and rosacea. It is so safe you can even sleep in it to use as a skin treatment.

How do you choose the colors/scents that you make available for your products?
I choose colors that will accommodate everyone's wardrobe. A color for every season...
When someone orders a foundation, I always include a shade lighter and a shade darker along with the foundation. The seasons change and people should not have to go out and keep buying color after color. No one, to the best of my knowledge, has ever provided that service to a buyer. If you buy a color that doesn't match your skin tone from most companies, you are stuck with it. Not so with us. If your foundation color is not quite like you had expected, we replace it at no extra cost to the customer and they get to keep the product they bought.

What do you love about this item?
I love the 15 piece Mineral Magic Cosmetics Gift Set. The buyer gets to choose their eye colors, blushes, lotion bar scent, foundation color, and lip balm scent. Plus they get a 5 piece brush and carrying case collection and a retractable brush that can be taken with them anywhere they go. I always give out generous samples for buyers so that they can experience the other products I provide. No matter what the buyer chooses, they always get above and beyond what they paid for. That's what separates Mineral Magic Cosmetics from the rest.

What is your favorite type of make-up to make (i.e. eyeshadow, foundation, scents) and why?
I don't have a favorite color because you can take your foundation blush or eye makeup and blend them together to make your own color.

Did you play dress up with your mom's make-up when you were little?
I never played dress up with my mother's makeup. I wasn't allowed. boy, did I show her!

Tell me something fun about where you live?
I live in the Poconos. I am 4 miles from Pocono Raceway. There is always something going on and people to see.

Do you make other things outside of make-up? If so, what?
I make other things besides makeup. I have creamy lotions, hard lotion bars, face and body scrubs, lip balms and roll on body oils.

To learn more about Mineral Magic, visit www.MineralMagicCosmetics.com or the Mineral Magic eBay store.

Monday, August 20, 2007

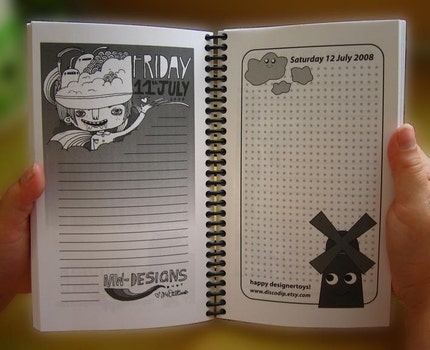
2008 Diary Is Here!

If you saw my post about the 2008 Diary, put together by Fantazya, I'm pleased to announce that the finished product is now available. This diary features hundreds of artists that sell their wares online and is a beautiful way to document 2008; as well as giving you a new artist to view every time you open it!

Click here to purchase the diary.

Wednesday, August 15, 2007

Moving on up - my 8 tips!!

Last month, my boyfriend and I decided to get a place together and once I got over the initial excitement, the realization that I had to start packing finally hit me. I've been in my studio apartment for almost 4 years to the day so this is a task that has definitely been a little daunting. I think it was also a little crazy that he had to be out of his old apartment by August 1st, so we've been squished into my studio (a large studio, but still a studio) for the last 2 weeks. It's not been so bad except for the bruises caused by falling over things.
You will need:
  • Packing tape (lots of it)
  • Boxes (I love Office Depot boxes because they have handles and we get lots of them at work)
  • Sharpie pens (preferably black),
  • Band-aids
My 8 tips to moving efficiently!
(Why 8 you ask? That's all I could come up with...I'm tired).

1) Clear a space for the boxes you pack to be stacked.
Suggestion: Keep an open escape route to the door so that you can exit the room.

2) Check bottoms of boxes are secure and seal accordingly with tape. Seal the packed boxes well at the top too.
Why?: There is nothing worse than packing it and realizing that if you lift it, the bottom will collapse. Use excess tape as necessary. It's cheaper to buy too much tape than it is to have to super glue the china plate your grandmother left you.

3) Pack things you are 100% sure you will not need.
Why this helps: This eliminates the chances that you will run around at midnight looking for your toothbrush and being unable to find it because you packed it in the box with all the stuff from your computer desk.

4) Label each box clearly with what "category" it's contents fall under. Feel free to be more specific.
Tip: Don't let the Sharpie pen you are using to mark the boxes fall in between other boxes. This is not helpful and will in fact impede your progress.

5) Use moving and packing as a good reason to purge things that you no longer need.
Hint: If you are a pack-rat like I am, have someone you trust go through your stuff with you. Tell them to be ruthless. When you find that Styx t-shirt with the holes that you used to wear when you were 13, that you feel like you need because of your intense emotional attachment to it, make them put it straight in a donation bag and out of eye-sight.

6) Hire movers! It's not as cheap as doing it yourself but it's worth it.
Why this is especially important: It saves your sanity, it saves friendships, it prevents injuries being sustained from having furniture dropped on you from a great height, as you attempt to navigate 2 flights of stairs while hoping to catch the queen-sized mattress being suspended from the balcony. Hired movers are professionals. It's what they do.

7) Movers will generally make you pay extra for wrapping furniture and for the actual wrap itself. You can buy a 1500' roll of plastic wrap at Office Depot.
Helpful tip: If your significant other starts to bother you, you can plastic wrap them to something until they learn their lesson.

8) When you arrive at your new place with boxes and furniture in tow, make sure you know exactly which box your liquor cabinet was packed in.
Why this is important: You're going to need it to immediately celebrate your success at having finally done it. The beauty of it being that you don't actually need to unpack glasses to enjoy the tasty refreshment. I would suggest waiting until you've sobered up to unpack though.

Have I been paying attention to my own tips? In most cases, yes. The good news is that we're picking up the keys tonight, which I am thrilled about, and I'll finally be able to get some of the boxes out of my place and figure out what on earth is still left to move!!

Wednesday, August 8, 2007

Marking the stitch....more swap fun!

Another crafty swap event (yes, I admit I am mildly addicted but by no means have a problem) has taken place. This time around, I have stitch markers for your viewing.

Up until now, stitch markers have been something I've been aware of but haven't needed to use much, and I have always been able to get away with using scrap yarn. This swap inspired me to try making stitch markers for the first time, and even better, use shrinky dinks!

I should note that when my swap partner said she'd like something with shrinky dinks, I was a little perplexed as I wasn't entirely sure what they are. Perhaps we didn't have them in England when I was growing up there. After I looked them up on Google and on craftster.org, what I have since discovered is that they are very entertaining!

The requirement was to make a set of 12 markers for my partner, so I started off by coming up with my concept, which ended up being the 12 signs of the zodiac. I found images representing those signs, traced and colored them onto the shrinkies, amused myself with the shrinking process in the oven, and this is how they ended up...
The actual tracing of the images is what took the longest, but I have to say that a 12 pack of colored Sharpies certainly can go a long way!

In the meantime, my partner was busy making a set of markers to send to me. She seems to have had much more experience than I have making markers in the past so I was excited to see what she would come up with. Fortunately the Canadian post didn't take as long as we thought it might and here's what I received in return - there are some really pretty and unique beads included in this set, plus a couple of different sizes for my projects. I can't wait to find a project to use these for.

This whole swap process definitely has my creative juices flowing and is inspiring me to try new things. For as long as someone is organizing them, I'm sure I'll keep joining them!