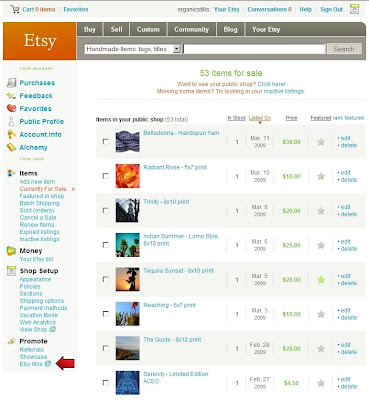
Step 1: Locate your Etsy mini. by clicking on "Your Etsy" at the top of the page. The link to your Etsy mini is on the lower left column of the page.
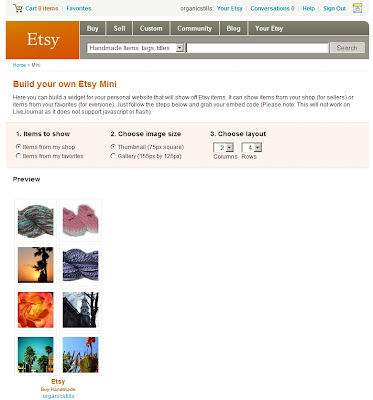
 Step 2: When the Etsy mini page comes up, you can now choose to show "items from my shop" and decide between thumbnails or gallery. I personally like thumbnails as it isn't too big. Then decide on how many columns and rows you want it to show. I chose 2 columns, 4 rows for this demonstration.
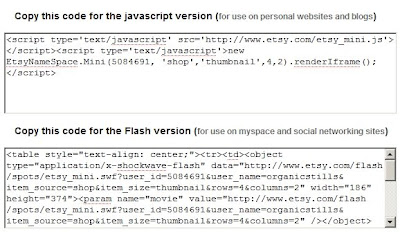
Step 3: At the bottom of the Etsy mini page, you will see two boxes with a bunch of html type blurb. The first box has the javascript version, which is what you would use for blogger. Keep this page open in your browser, we'll be coming back to it in a minute.
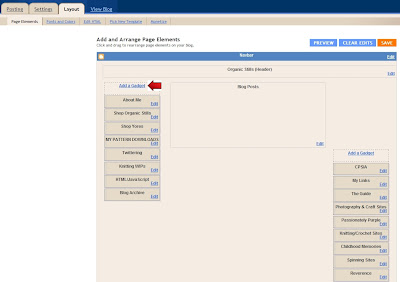
 Step 4: In another window, open up your blogspot. Click on the "layout" tab to get to the page where you can change how your blogspot looks. Most people probably have a 2 column blogspot. Mine is three columns and for this example I will be adding the Etsy mini to the left column of my blog by clicking on the "Add A Gadget" button. As you can see, that same button exists on the right hand column if I wanted to add it there instead.
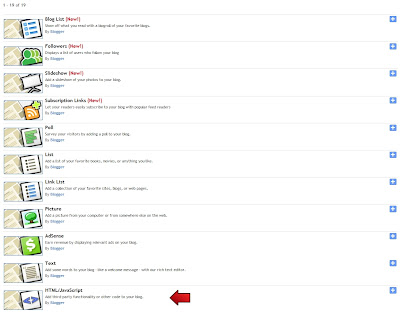
 Step 5: Once you click on the "Add A Gadget" link, a new window will open up that looks like the one below. Scroll down to locate the gadget that says "HTML/Javascript" then click on the + sign for that gadget.
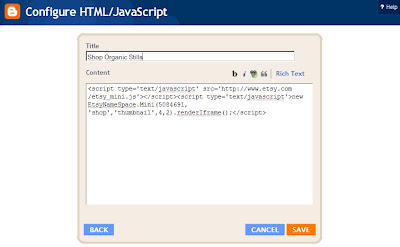
 Step 6: Now you've clicked on that, you will be taken to the screen where you can edit that gadget. Where it says "title", that will be the title that will appear on your blog above your Etsy mini. You can title it whatever you'd like, or you can even leave it blank if you want. I've called mine "Shop Organic Stills". Now you need to copy and paste the html that Etsy generated for you. Click back over to your Etsy mini page and copy all the text in the javascript version box (click in the box, Ctrl+A, Ctrl+C). Click back over to the gadget box in blogger and paste that right into the "content" box (Ctrl+V). Then remember to hit the save button!
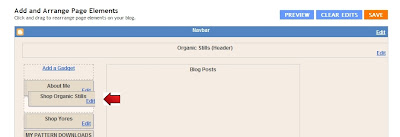
 Step 7: You will now be back at your layout page for your blogger. You should now be able to see the gadget that you have added. You can click and drag it to anywhere that you want it to show on your blog. Once that is done, hit the save button on the top right again to lock it into place. You can now view your blog and there it is for all to enjoy!
 I hope this helps any of you that have been confused! If you have more than one Etsy shop, then just repeat these steps for your other shop and you can have more than one Etsy mini on your blog (check out my left sidebar for an example).



1 comment:
Thank you so much! :D
Post a Comment